SSH Tunneling with a manual first hop
Follow-up to:
- SSH key authentication with PuTTY
- SSH key authentication with PuTTY, Part 2, Tunneling with Plink
- SSH Tips
What if that first hop doesn’t allow you to background tunnel through it? Either because SSH key authentication isn’t enabled, or because it uses a 2FA solution that requires manual interaction?
Thanks to colleague Dan Patterson, I’ve got steps that work out almost as quickly/simply as I had before.
- First hop with manual authentication and primary tunnel
- PuTTY Session for dynamic/on-the-fly to the protected network
- Single Session with many tunneled ports
- Bonus Tip
First hop with manual authentication and primary tunnel
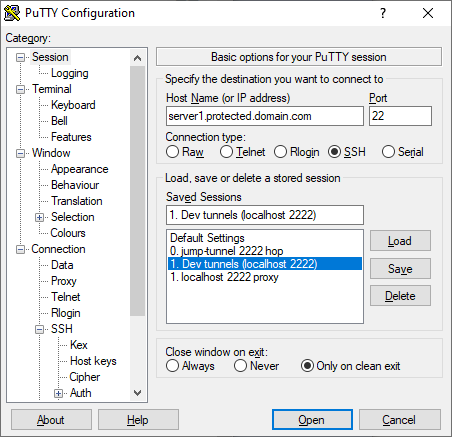
First, I’m opening a PuTTY session to the “jump” host where I have to both use a password rather than a key, and where I have to authorize 2FA through Duo.
The PuTTY Session “Host Name” and “Port” are to the server I have to reach in order to then reach the other desired destinations. The server that requires password authentication and/or manual 2FA interaction. I’ll call this the “jump host”.

Then, in the Connection > SSH > Tunnels configuration, I’m going to tunnel local 2222 to the SSH port (normally 22) on a host in a network on the other side of the jump host. Let’s call that the “protected network”, and the “tunnel host”.
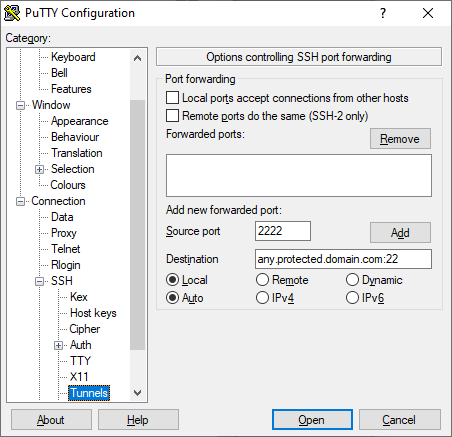
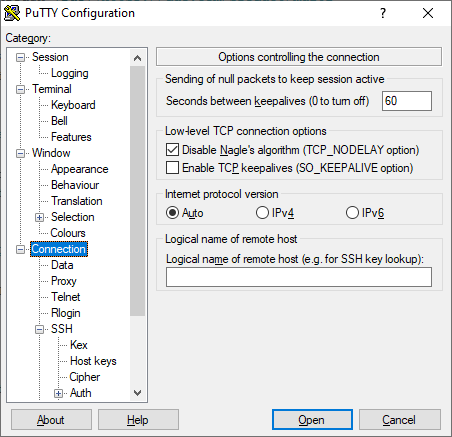
Under Connection, I’m also setting a “keepalive” on this PuTTY session so that it will stay open even though I won’t be interacting with it.
Login (to the jump host), fullfill the 2FA requirements, put the window somewhere you won’t close it. (I also gave it a unique size and font color to remind myself that it’s special.)
Trusting the tunnel host SSH host key
Note that if you’ve never connected directly from your local machine, through PuTTY/plink, to the tunnel host, you’ll have to connect there first and (verify and) accept its host key. Start a command-line plink command to your localhost:2222 equivalent:
plink -P 2222 localhost
You’ll be prompted to trust the key presented. Once you do that, you don’t need to continue the login, but now your PuTTY tunnels through this tunnel host won’t get stuck waiting for you to accept the host key.
PuTTY Session for dynamic/on-the-fly to the protected network
Now we can use the above connection to tunnel, in one step, to another host in the protected network (technically, anything reachable from that tunnel host, including perhaps other hosts that only it can reach, like via a VPN).
I’ve created another PuTTY Session for this, with no hostname specified, so that I can type in any host dynamically when I open it.
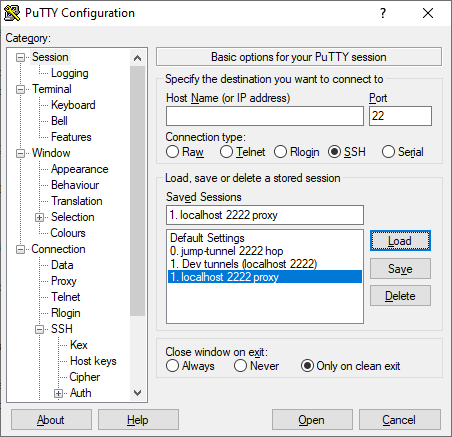
I’ve named the Session “localhost 2222 proxy” to let me know that I’m going to be connecting through the above tunnel.
Now, here I’m using the same local proxy “plink” approach as described in my earlier post, but with the proxy host being said localhost:2222.
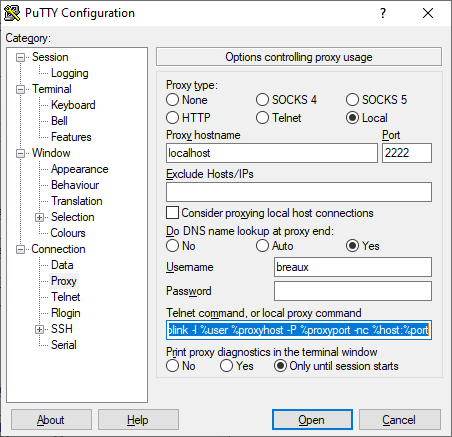
The small addition needed to the prior plink command was the -P one for the custom port:
c:\Program Files (x86)\PuTTY\plink -l %user %proxyhost -P %proxyport -nc %host:%port
Authentication to the Tunnel/Proxy host
You have to specify how to authenticate to your tunnel host when proxying through it. Either:
- the above
-l %user%has to be specified, with the Username field filled in, and you have to have SSH key authentication enabled on the tunnel host, with Pageant running locally, or - the Username and Password fields have to both be filled in and
-pw %passmust be added to the plink command as well.
PuTTY Default Settings session
I also discovered, BTW, that if you have just one user ID you use on every system, and if you specify that user ID in the special PuTTY “Default Settings” session’s Connection > Data > Auto-login username field, this automatically supplies your user name in place of having to add the plink ... -l option at all.
This fact has thrown me off a number of times when something works for me but not for a colleague who hasn’t set up her Default Settings that way.
Single Session with many tunneled ports
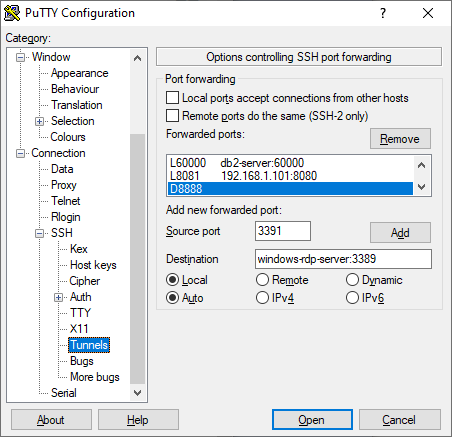
Finally, my “big” PuTTY session which automatically sets up many different tunneled ports for me, including database server ports and the super-useful dynamic port that I can use as a browser SOCKS proxy.
I used a hardcoded destination in the protected network, but that’s not required.
Same proxy setup as above, just this time we’re also going to store several tunnels to ports which are on different servers only accessible from the protected network.
For instance, below I have a DB2 port tunneled on 60000, an HTTP port tunneled on 8081->8080, a Dynamic Socks tunnel on 8888, and I’m about to add a Windows Remote Desktop port on 3391->3389.
NOTE you could run the dynamic tunnel - my 8888 - up in the initial “Jump” connection instead. If you only need SOCKS connectivity to things the jump host can reach. As opposed to things the tunnel host can also reach.
Bonus Tip
Again, plug for the super useful SwitchyOmega Firefox plugin for routing different hosts & networks through different proxies. Like the 8888 “dynamic port” SOCKS proxy we created above.